How to Build Your First AI Automation Workflow with n8n and ChatGPT
What We Are Building
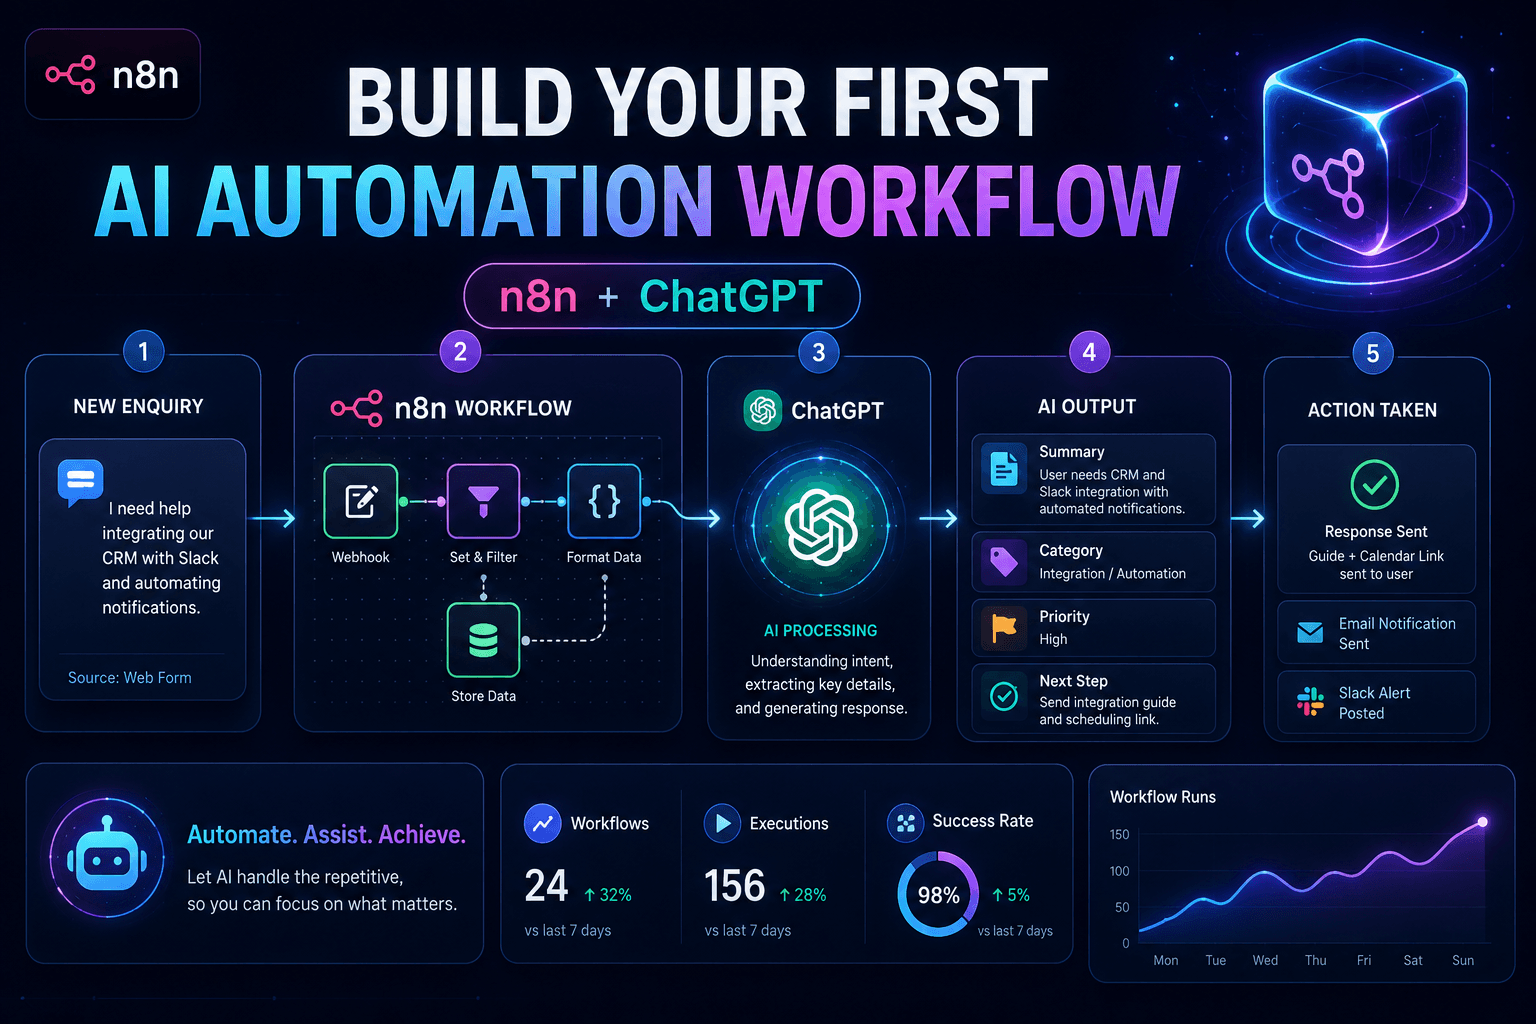
This AI automation workflow is simple enough for beginners but useful enough to show how n8n and ChatGPT can work together in a real process.
In this tutorial, we are going to build a simple n8n ChatGPT workflow.
The workflow will take a messy enquiry message, send it to AI, and return something much more useful:
- A short summary
- A category
- A priority level
- A suggested next step
- A clean internal note you could send to yourself, your team, or a CRM
Nothing too scary.
No 47-node monster workflow.
No “enterprise digital transformation platform architecture” nonsense.
Just a practical first automation that shows how n8n and ChatGPT can work together.
Here is the idea:
A parent sends an enquiry about a holiday workshop.
The message is useful, but it is also a bit unstructured.
Instead of reading every message manually and deciding what to do next, we will use AI to summarise and classify it.
The workflow will look like this:
- Start the workflow manually
- Create example enquiry data
- Send the enquiry to ChatGPT/OpenAI
- Ask AI to summarise the message
- Ask AI to classify the enquiry
- Format the result into a clean internal notification
- Test the output
- Look at how to upgrade it later with a webhook
By the end, you should understand the basic building blocks of an AI automation workflow.
And more importantly, you will have something you can actually adapt.
Why This Tutorial Matters
A lot of automation tutorials jump straight into complex workflows.
They start with webhooks, APIs, databases, authentication, JSON expressions, credentials, error handling, custom code, and by step five you are quietly questioning your life choices.
This tutorial is different.
We are starting with a simple workflow first.
Why?
Because the first goal is not to build the most advanced automation in the world.
The first goal is to understand how the pieces fit together.
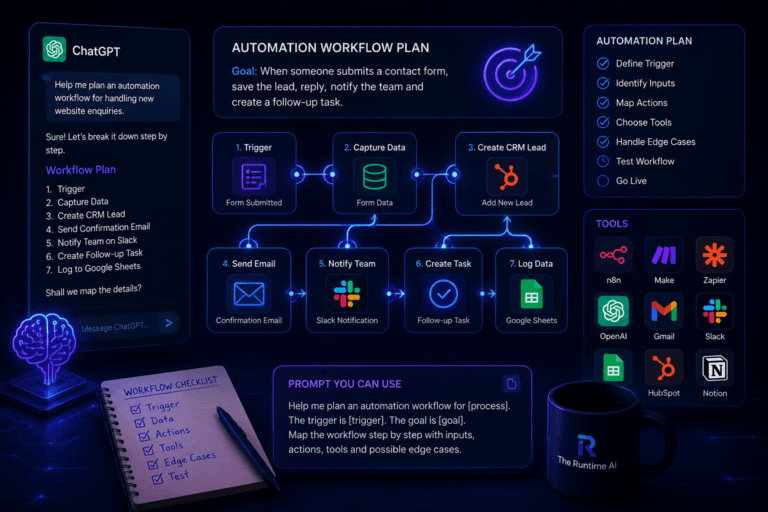
If you have not planned your automation yet, read this guide on how to use ChatGPT to plan an automation workflow before you start building.
Once you understand the pattern, you can use it everywhere:
- Website enquiries
- Booking requests
- Support tickets
- Customer messages
- Lead qualification
- Email summaries
- CRM updates
- Slack notifications
- Internal admin workflows
The basic pattern is:
Input comes in.
AI processes it.
The workflow formats the result.
Another tool receives the output.
That is the foundation of many AI automations.
What You Need Before Starting
You need a few things before building this workflow.
1. An n8n account or n8n instance
If you are still new to n8n, start with this beginner guide to what n8n is and why it is useful.
You can use n8n Cloud or a self-hosted n8n setup.
If you are just starting, n8n Cloud is usually easier because you do not need to think about hosting, servers, updates, or why Docker suddenly has opinions.
Self-hosting is great later if you want more control.
For this tutorial, either option is fine.
2. Access to OpenAI or an AI model provider
To use ChatGPT-style AI inside n8n, you need access to an AI provider such as OpenAI.
In n8n, you will normally connect your OpenAI account using credentials.
That usually means adding an API key.
Do not paste your API key into random nodes, screenshots, blog comments, or group chats.
API keys are like house keys.
You do not leave them under the digital doormat.
3. A simple test message
We will use this example enquiry:
“Hi, I’m interested in booking a workshop for my child during the school holidays. Could you send me more details about available dates, prices and whether siblings can attend together?”
This is a good example because it feels like a real message.
It has useful information, but it is not neatly structured.
Perfect for AI.
4. About 20–30 minutes
You do not need to finish everything perfectly.
You just need to understand the workflow.
The goal is progress, not perfection.
If your first workflow works after only one mistake, congratulations.
If it takes five mistakes, congratulations again.
That is also normal.
The Final Output We Want
Before building anything, let’s define the result.
When the example enquiry goes into the workflow, we want AI to return something like this:
Summary:
Parent is asking about school holiday workshop availability, prices, and whether siblings can attend together.
Category:
Booking enquiry
Priority:
Medium
Suggested next step:
Send workshop dates, pricing, sibling attendance information, and booking link.
Internal note:
New booking enquiry from a parent asking about holiday club dates, prices, and sibling attendance. Reply with availability, pricing, and booking details.
That is already much more useful than a raw message sitting in an inbox.
Now imagine doing this automatically for every enquiry.
That is where automation starts to become interesting.
Step 1: Create a New n8n Workflow
Open n8n and create a new workflow.
Give it a clear name.
Use something like:
AI Enquiry Summary Workflow
or:
First n8n ChatGPT Workflow
Do not name it something like:
Test 1
Because if you build more workflows later, you will eventually have:
- Test 1
- Test 2
- Real Test
- Final Test
- Final Test New
- Final Final Actual
- Do Not Delete
- Really Do Not Delete
This is how chaos begins.
Use a clear name from the start.
Step 2: Add a Manual Trigger
Every n8n workflow needs a starting point.
For this beginner tutorial, use a Manual Trigger. If you want to understand how this node works, you can check the official n8n Manual Trigger documentation.
The Manual Trigger lets you start the workflow yourself by clicking Execute Workflow.
This is perfect for testing because we do not need a live form, webhook, or website integration yet.
Add a node:
Manual Trigger
This node does not need much configuration.
It simply starts the workflow.
Your workflow now has a beginning.
Very exciting.
Not visually dramatic, but important.
Step 3: Add Example Enquiry Data
Next, we need some data for the workflow to process.
Add a new node after Manual Trigger.
Use:
Edit Fields
or
Set
Depending on your n8n version, you may see it called Edit Fields (Set).
This node lets you create test fields.
Add these fields:
name
Sarah
sarah@example.com
message
Hi, I’m interested in booking a workshop for my child during the school holidays. Could you send me more details about available dates, prices and whether siblings can attend together?
source
Website contact form
submitted_at
2026-06-05
Now your workflow has fake enquiry data to work with.
This is useful because you can test the workflow without waiting for a real person to send a message.
Automations are easier to build when you control the test data.
Real users are unpredictable.
Test data behaves itself.
Mostly.
Step 4: Add the OpenAI / ChatGPT Step
Now we need the AI step.
Add an OpenAI node. n8n also has official OpenAI node documentation if you want to check the available options and supported operations.
Depending on your n8n version, the exact operation may look slightly different, but the idea is the same:
You want to send a prompt to an AI model and receive a response.
Look for an operation related to chat, text generation, or model response.
The goal is to send the enquiry message into the model and ask for structured output.
This is where the workflow becomes useful.
Instead of simply passing data from one app to another, we are asking AI to understand the message.
Step 5: Write the AI Prompt
This is the most important part.
Bad prompt:
Summarise this.
That might work, but it gives the AI too much freedom.
Better prompt:
You are helping process website enquiries for a small workshop business.

Read the enquiry below and return a clear internal summary.

Enquiry:
{{ $json.message }}

Return the answer in this format:

Summary:
Category:
Priority:
Suggested next step:
Internal note:

Use simple language. Do not invent details. If information is missing, say what is missing.
This prompt is much better because it gives the AI:
- A role
- The task
- The source message
- The exact output format
- A rule not to invent information
That last part matters.
AI can be very helpful.
AI can also confidently make things up if you let it wander around unsupervised.
Treat it like a clever intern with too much coffee.
Useful, but give clear instructions.
Step 6: Insert the Message Field Dynamically
Inside the prompt, you need to reference the message from the previous node.
In n8n, this is usually done with an expression.
The expression may look like this:
{{ $json.message }}
This tells n8n:
“Take the message field from the current item and place it here.”
So if your Edit Fields node has this:
message: Hi, I’m interested in booking a workshop...
The OpenAI prompt will receive that message.
This is one of the most important n8n ideas to understand:
The workflow passes data from node to node.
Each node receives data, does something with it, and passes data forward.
Once you understand that, n8n becomes much less mysterious.
Still occasionally annoying.
But less mysterious.
Step 7: Test the AI Step
Click Execute Workflow.
If everything is connected properly, n8n should run:
Manual Trigger
→ Edit Fields
→ OpenAI
Then you should see the AI response in the output.
A good response might look like:
Summary:
Parent is asking about school holiday workshop availability, prices, and whether siblings can attend together.

Category:
Booking enquiry

Priority:
Medium

Suggested next step:
Send available dates, pricing, sibling attendance information, and the booking link.

Internal note:
New booking enquiry from a parent asking about dates, prices, and sibling attendance. Reply with clear workshop details and booking instructions.
If you get something like that, the core workflow works.
That is the first big win.
You now have an AI workflow that can turn a messy message into a clean internal summary.
Step 8: Make the Output More Structured
The output above is readable, but for automation it is often better to use structured data.
Structured data is easier to send to other tools later.
For example, instead of a paragraph, you may want JSON.
Ask the AI to return JSON like this:
{
  "summary": "",
  "category": "",
  "priority": "",
  "suggested_next_step": "",
  "internal_note": ""
}
Use this improved prompt:
You are helping process website enquiries for a small workshop business.

Read the enquiry below and return a structured JSON response.

Enquiry:
{{ $json.message }}

Return only valid JSON using this exact structure:

{
  "summary": "",
  "category": "",
  "priority": "",
  "suggested_next_step": "",
  "internal_note": ""
}

Rules:
- Do not invent details.
- Use simple language.
- Priority must be Low, Medium or High.
- Category should be one of: Booking enquiry, Pricing question, Support request, Collaboration request, Other.
This is more useful because later you can send each field to a different place.
For example:
- Summary to Slack
- Category to CRM
- Priority to task manager
- Internal note to email
- Suggested next step to admin dashboard
Structured output makes the workflow easier to scale.
It is the difference between having a clean drawer and throwing everything into one cupboard because guests are coming over.
Both technically work.
Only one is sustainable.
Step 9: Add a Formatting Node
After the OpenAI node, add another Edit Fields node.
This node will create a clean internal notification.
The exact field mapping depends on how your OpenAI node returns data, but conceptually you want to create something like this:
notification_title
New AI-Processed Enquiry
notification_body
Name: Sarah
Email: sarah@example.com
Category: Booking enquiry
Priority: Medium

Summary:
Parent is asking about school holiday workshop availability, prices, and whether siblings can attend together.

Suggested next step:
Send available dates, pricing, sibling attendance information, and the booking link.
This is the version you could send to yourself, Slack, email, Notion, Airtable, Google Sheets, or a CRM.
The point is that the workflow has now transformed raw input into useful output.
That is automation.
Not just moving data.
Improving the data.
Step 10: Add a Simple IF Step
Now let’s make it slightly smarter.
Add an IF node after the AI response.
The IF node can check the priority.
For example:
If priority equals:
High
Then route it one way.
Otherwise, route it another way.
For this tutorial, keep it simple.
Example logic:
- If priority is High → create urgent notification
- If priority is Medium or Low → create normal notification
You do not need to connect real email or Slack yet.
You can simply create two different formatting outputs.
This teaches you an important automation concept:
Not every item should follow the same path.
Some messages need urgent attention.
Some can wait.
Some should be ignored completely.
Especially if the message says:
“Dear website owner, I can get you ranking number one on Google tomorrow.”
That one can go directly into the digital bin.
Step 11: Add a Test Output
For a beginner workflow, you do not need to connect every external app immediately.
You can test the final output inside n8n first.
Run the workflow and check:
- Did the input data appear correctly?
- Did AI understand the message?
- Did the summary make sense?
- Did the category make sense?
- Did the priority make sense?
- Did the formatted notification look clean?
- Did the IF logic work?
If yes, you have a working AI automation workflow.
It may not be connected to a live website yet, but the logic is working.
That is how you should build automations:
Small steps.
Test each step.
Then expand.
Do not build the whole thing at once and then try to debug everything at the end.
That is how people end up staring at a screen at midnight whispering:
“Why are you like this?”
Usually to a webhook.
Step 12: Example Final AI Automation Workflow
Your first version might look like this:
- Manual Trigger
- Edit Fields: Create test enquiry data
- OpenAI: Summarise and classify enquiry
- Edit Fields: Format notification
- IF: Check priority
- Edit Fields: Create urgent or normal output
That is enough for a first tutorial.
You have learned:
- How to start a workflow
- How to create test data
- How to send data to AI
- How to write a useful prompt
- How to structure AI output
- How to format the result
- How to add basic logic
- How to test the workflow
That is a lot.
More than enough for a first workflow.
Real Example: Workshop Enquiry
Let’s use the example message again:
Hi, I’m interested in booking a workshop for my child during the school holidays. Could you send me more details about available dates, prices and whether siblings can attend together?
The AI output could be:
{
  "summary": "Parent is asking about school holiday workshop availability, pricing and whether siblings can attend together.",
  "category": "Booking enquiry",
  "priority": "Medium",
  "suggested_next_step": "Send available dates, pricing details, sibling attendance information and the booking link.",
  "internal_note": "New booking enquiry from a parent interested in school holiday workshops. They want details about dates, prices and sibling attendance."
}
This is clean.
This is useful.
This can go into another system.
Now imagine receiving 20 enquiries.
Instead of reading every message from scratch, you get clean summaries and categories.
That saves time.
It also reduces the chance of missing something important.
Real Example: Support Request
Now test a different message:
Hi, I booked a place for my daughter but I have not received the confirmation email. Could you check if the booking went through?
Expected AI output:
{
  "summary": "Parent says they booked a place but did not receive a confirmation email.",
  "category": "Support request",
  "priority": "High",
  "suggested_next_step": "Check the booking status and payment record, then resend the confirmation email if the booking is confirmed.",
  "internal_note": "Potential booking confirmation issue. Check whether the booking and payment were successfully recorded."
}
Notice how this should probably be higher priority.
A missing confirmation email can create confusion for the customer.
This is where classification becomes useful.
Not every message is equal.
Some need faster action.
Real Example: Collaboration Request
Test another message:
Hi, I run a local parenting newsletter and would love to discuss featuring your workshops in our next issue. Who should I speak to?
Expected AI output:
{
  "summary": "Sender wants to discuss featuring the workshops in a local parenting newsletter.",
  "category": "Collaboration request",
  "priority": "Medium",
  "suggested_next_step": "Reply with collaboration contact details and ask for newsletter audience, dates and feature options.",
  "internal_note": "Potential local partnership opportunity with a parenting newsletter."
}
This is a different type of enquiry.
It should not be handled like a booking issue.
That is why categorisation helps.
Common Mistakes and Fixes
Mistake 1: The AI Gives a Long Essay
If the AI writes too much, tighten the prompt.
Add:
Keep the response short and practical.
or:
Return only the requested fields. Do not add extra explanation.
AI sometimes likes to explain itself like it is being paid by the paragraph.
Be specific.
Mistake 2: The AI Invents Details
If the AI adds things that were not in the message, add this rule:
Do not invent details. If something is not mentioned, write "Not provided".
This is important for business workflows.
You do not want the AI guessing prices, dates, policies or customer details.
That way lies chaos.
Mistake 3: The Output Format Changes
If the output format keeps changing, ask for JSON and specify the exact structure.
Use:
Return only valid JSON.
Use this exact structure.
Do not include markdown.
Do not include explanation outside the JSON.
This makes the response easier to parse later.
Mistake 4: The Workflow Fails Because a Field Name Is Wrong
This is very common.
Maybe your field is called:
message
but your prompt references:
customer_message
n8n cannot read your mind.
Check field names carefully.
If something is not working, inspect the output of each node.
The data usually tells you what went wrong.
Quietly.
In JSON.
Because apparently that is how computers express emotion.
Mistake 5: Trying to Build Too Much at Once
Do not start with:
- Website form
- Webhook
- Database
- CRM
- Slack
- AI
- Payment provider
- Admin dashboard
- Error handling
- Reporting
That is too much for a first workflow.
Start with test data.
Then AI.
Then formatting.
Then one output.
Then improve.
Small workflows are easier to understand.
Big workflows are easier to break.
How to Upgrade This Later With a Webhook
Once the test workflow works, you can replace the Manual Trigger with a Webhook.
A Webhook lets another system send data into n8n. The official n8n Webhook documentation is useful when you are ready to connect a real form, app or external service.
For example:
- A website contact form
- A booking form
- A payment provider
- A CRM
- A custom app
- A form tool
Instead of manually creating test data, the workflow receives real data.
The upgraded version could look like this:
- Webhook receives form submission
- n8n validates required fields
- OpenAI summarises and classifies the message
- n8n saves the data to Google Sheets, Airtable, Supabase or a CRM
- n8n sends an internal notification
- n8n sends a confirmation email
That is a real business workflow.
But do not start there.
Build the manual version first.
Then upgrade.
It is much easier to replace the trigger later than to debug everything at the same time.
How to Upgrade This With Google Sheets
A simple next upgrade is Google Sheets.
After the AI step, add a Google Sheets node and store:
- Name
- Original message
- Summary
- Category
- Priority
- Suggested next step
- Date received
This gives you a basic enquiry tracker.
Not fancy.
But useful.
And useful beats fancy almost every time.
Unless we are talking about coffee machines.
Then fancy is acceptable.
How to Upgrade This With Slack
Another upgrade is Slack.
After the AI step, send a Slack message like:
New enquiry received

Name: Sarah
Email: sarah@example.com
Category: Booking enquiry
Priority: Medium

Summary:
Parent is asking about holiday workshop dates, prices and sibling attendance.

Suggested next step:
Send available dates, pricing and booking link.
This is useful if you work with a team.
It also means important enquiries do not disappear into email inbox darkness.
How to Upgrade This With Email
You can also send the result by email.
For example:
Subject:
New booking enquiry: Medium priority
Body:
A new enquiry has been received.

Name: Sarah
Email: sarah@example.com

Summary:
Parent is asking about holiday workshop availability, prices and sibling attendance.

Suggested next step:
Send available dates, pricing information and booking link.
This is simple but practical.
For many small businesses, email is still the main workflow dashboard.
Not ideal.
But real.
How to Upgrade This With a CRM
If you use a CRM, the workflow can create or update a lead.
Fields could include:
- Name
- Enquiry summary
- Category
- Priority
- Status
- Source
- Follow-up date
This is where automation becomes more valuable.
The enquiry does not just get summarised.
It becomes part of a follow-up process.
That is the difference between “AI wrote a nice summary” and “AI helped improve the business process.”
The second one is much better.
A Better Prompt for Production
For a real workflow, use a more controlled prompt like this:
You are an assistant helping process website enquiries for a small business.

Analyse the enquiry and return only valid JSON.

Input:
Name: {{ $json.name }}
Email: {{ $json.email }}
Message: {{ $json.message }}
Source: {{ $json.source }}

Return this exact JSON structure:

{
  "summary": "",
  "category": "",
  "priority": "",
  "suggested_next_step": "",
  "missing_information": "",
  "internal_note": ""
}

Rules:
- Do not invent details.
- If information is missing, mention it in missing_information.
- Category must be one of: Booking enquiry, Pricing question, Support request, Collaboration request, Other.
- Priority must be Low, Medium or High.
- Keep the summary under 30 words.
- Keep the internal note practical and clear.
- Do not include markdown.
- Do not include text outside the JSON.
This prompt is more reliable because it gives the AI boundaries.
And AI loves boundaries.
Well, maybe not loves.
But it behaves better with them.
Testing Checklist
Before calling your workflow finished, test it with different messages.
Use this checklist:
- Test a normal booking enquiry
- Test a pricing question
- Test a support issue
- Test a collaboration request
- Test a message with missing email
- Test a very short message
- Test a long messy message
- Test a message with unclear intent
- Test whether the category makes sense
- Test whether the priority makes sense
- Test whether the output format stays consistent
A workflow that works once is not finished.
A workflow that works across different realistic cases is much better.
The goal is not perfection.
The goal is reliability.
Example Test Messages
Use these to test your workflow.
Booking enquiry
Hi, I want to book two places for the next school holiday workshop. Can siblings attend together and what dates are available?
Pricing question
Could you send me the price for one child attending three days next week?
Support request
I paid for a booking but did not receive a confirmation email. Can you check please?
Collaboration request
I run a local parents group and would like to feature your workshops. Who can I speak to?
Unclear message
Hi, can you send more info?
That last one is useful because it tests whether AI can identify missing information.
A good output might say:
missing_information: The sender did not specify what information they need.
That is exactly the kind of thing you want the AI to catch.
What You Have Built
If you followed the tutorial, you have built a basic but useful AI automation workflow.
It can:
- Accept enquiry data
- Send a message to AI
- Summarise the enquiry
- Classify the message
- Assign priority
- Suggest the next step
- Prepare a clean internal note
That is a strong first workflow.
It is simple enough to understand, but useful enough to adapt.
Most real AI automation workflows are just more advanced versions of this same pattern.
Input.
AI processing.
Structured output.
Action.
That is the pattern.
Where to Go Next
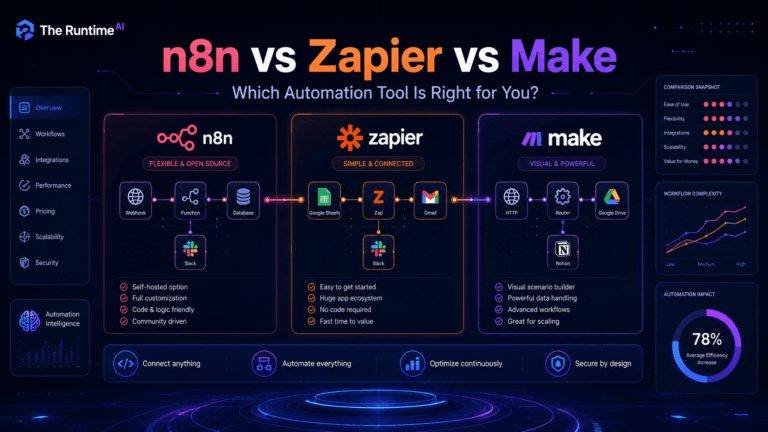
If you are still deciding which automation platform to use, this comparison of n8n vs Zapier vs Make can help you choose the right tool.
Once this works, you can improve it in stages.
Stage 1: Save the result
Send the output to Google Sheets, Airtable, Notion, Supabase or a CRM.
Stage 2: Notify someone
Send the summary to Slack, Teams or email.
Stage 3: Add a webhook
Replace the Manual Trigger with a Webhook so a website form can send real data into the workflow.
Stage 4: Add error handling
Create a fallback path when something fails.
For example:
- AI does not respond
- Required field is missing
- Output is not valid JSON
- Email fails to send
- CRM update fails
Stage 5: Add human review
For high-priority messages, notify a person before sending any response.
This is important.
Do not let AI send sensitive replies automatically until you trust the workflow.
Even then, be careful.
AI is useful.
But “fully automated customer communication with no review” can become exciting in the wrong way.
Final Thoughts
This first n8n ChatGPT workflow is simple on purpose.
It does not try to automate everything.
It takes one messy input and turns it into something cleaner, more structured and more useful.
That is a great first automation.
You now understand how to:
- Start a workflow manually
- Add test data
- Send data into AI
- Write a structured prompt
- Ask for clean output
- Format the result
- Test different scenarios
- Plan future upgrades
This is the foundation of many AI workflows.
Once you understand this pattern, you can apply it to contact forms, booking enquiries, support tickets, lead qualification, content workflows, admin tasks and internal business systems.
Start small.
Build one useful workflow.
Test it properly.
Then improve it.
That is how automation becomes practical.
Not magic.
Not hype.
Just small systems that save time and reduce repetitive work.
And if your first workflow breaks?
That is fine.
That is not failure.
That is just n8n saying hello.